Showing posts sorted by date for query moores. Sort by relevance Show all posts

Monday, October 13, 2014

"Talking Irises" TALL BEARDED IRISES & COMPLEMENTARY COLOR SCHEMES--Planning your iris bed

by Susanne Holland Spicker

"Gardening is such an incredible joy, and the more successful you are as a gardener, the more enjoyable your gardening becomes" Mike McGroarty
'WINNING EDGE'  Ghio   1997   36"   ML

Planning irises in complementary color schemes has been an enjoyable production in progress in my flower beds. The beds have transitioned from a few irises in the garden in 1995, to presently 15 to 45 favorite varieties in each of the 14 iris beds throughout the yard. I couldn't have imagined how smitten I would become with these tall beauties back then, each year exclaiming I didn't have room for one more. I now have over 300 named cultivars, and I definitely don't have room for more! To keep my beds organized, I make a collage of irises in the bed, with favorites I want to add. This method works best for me, and it may work for you.

The color palette for my pastel bed is one of my favorites:
(From upper, row 1, l-r) 'BUBBLY MOOD' Ghio '84, 'BUBBLING OVER' Ghio '82, 'GOODNIGHT MOON' Schreiner '95, 'RUFFLED BALLET' Roderick '75, 'ROLE REVERSAL' Ghio '10, 'RHINELANDER' Schreiner '06 (row 2) 'PRETTY GENEROUS' Innerst '04, 'WINNING EDGE' Ghio '97, 'SKATING PARTY' Gaulter '83, 'EMBRACE ME' Van Liere '08, 'ASCII ART' Moores '97, 'GLOWING SMILE' Hager '01, (row 3) 'SOCIETY PAGE' Ghio '00, 'BUBBLING WAVES' Ghio '06, 'GOING DUTCH' Van Liere '09, 'QUEEN'S CIRCLE' Kerr '00, 'LACED COTTON' Schreiner '80, 'ELECTRABRITE' Brown '83, (row 4) 'POND LILY' Jones '95, 'COMING UP ROSES' Gatty '92, 'ABOVE THE CLOUDS' Schreiner '01, 'GLOBAL CROSSING' Van Liere '12, 'ELISA RENEE' Gaulter '93, 'MARY FRANCES' Gaulter '73

When planning out an iris bed, these are things that have worked best for me to achieve maximum success:  

  • What look do I want to accomplish?
  • What color schemes do I want to have?
  • What is the bloom time of the iris and companion plants?
  • What companion plants will go best with my irises, giving a variety of texture, shape, and size?
  • Which plants need to be moved or replaced?
  • Mapping out the bed and recording it in a notebook and computer.
  • 'GLOBAL CROSSING'  (Van Liere '12   36"   M)
This long wrap-around porch pastel bed now has 45 different tall bearded irises.
'EVENING TIDINGS', 'GLOBAL CROSSING', 'BUBBLING WAVES', 'LACY DAY', 'INTO THE NIGHT', 'EMBRACE ME'
'DESIGNER LABEL' (Ghio '03  38"  M-L)
'SWEET SERENADE', 'RUFFLED BALLET', 'SOCIETY PAGE', 'CROWNED HEADS', 'HEATHERIDGE', 'ELECTRABRITE'
'BUBBLING OVER' (Ghio   '82   36"  M)
'LACY DAY', 'BUBBLING WAVES', 'GLOBAL CROSSING'
'BUBBLING WAVES' (Ghio 36"  VE-E)
'OVERJOYED' (Gatty by Keppel '94   35"  M)
Irises come in a vast array of colors, multiply annually, and are easy to divide or move; so if the outcome isn't what you had in mind, changes can easily be made. I am always refining my beds. This is where a map of your irises is so beneficial.

Whether you're a beginning iris gardener, or a seasoned iris lover with many years of growing under your belt, seeing success in your garden is always exciting and very rewardingI eagerly look forward to spring!

What kind of iris gardener are you?  Do you plan your beds out?  I'd love to hear what you have to say!


Sunday, May 11, 2014

"Talking Irises" TALL BEARDED IRISES--WHAT IS A "SHOW STALK" IRIS?

Susanne Holland Spicker

As a lover of irises but not well-versed in the particulars of show bench judging, I wanted to learn more about what makes a "show stalk" iris. My quest led me to several iris connoisseurs of whom I have the utmost respect. Hearing what they had to say has led me to believe that there are several thoughts on the subject. I present some of those ideas now for your consideration. 

Phil Williams, Rockytop Gardens, says his "idea of a show stalk," since he thinks "the major purpose of an iris is to bloom as long as possible in the garden, is one that is branched well to display each blossom to its maximum," and he personally prefers "one blossom at a time." He goes on to say "if a judge obeys the handbook when judging, he/she is supposed to be familiar with varieties on the show bench." Phil also says that when he goes "into a garden and sees a stalk with multiple blooms open," he knows it "will be a flash in the pan as a garden iris" and he "rarely will add it to the garden unless it has fabulous form." He says he "tires quickly of irises that remain in bloom only 5-7 days due to multiple blossoms open on a stalk." In judging, he says that the iris purists will "demand that the top/terminal flower be the one in bloom.  He says 'IRENE'S SONG', Nicodemus 2011, is a perfect example of a show bench stalk. (photo unavailable) 


Another expert, hybridizer Walter Moores, who has had experience in both judging and showing, says that a specimen with one bloom can win "Queen of Show, but generally the judges look for one with 2 or 3 blooms."  He goes on to say that the "Queen should be perfection, or near perfection, for its class," with "a new variety given preference over an older variety," which has proven a  "controversial statement in the manual." He shares some good examples of show stalks.

'NIGHT TRAIN TO MEMPHIS' Moores '08
Photo courtesy of Robert Treadway
'ABSOLUTE TREASURE' Tasco '06
Photo taken May, 2014, Walter Moores garden


Betty Wilkerson, hybridizer, judge and iris expert, tells us "the requirements for show bench irises are much different than for garden irises."  She adds that  with show bench irises we want 2-3 open blooms, but in the garden we want one at time so we get a long bloom season." She goes on to say "wide branching can be nice on the show bench, (with balance), but can tangle stalks in the garden."  


Thomas Johnson, of Mid-America Garden says the term show stalk means that it is a great iris for showing and that a "show stalk is one with wide candelabra branching, nice bud placement and a good bud count." 
'BRUSSELS'  (Johnson '04) taken at Barry and Lesley Blyth's garden in Australia
Photo courtesy Thomas Johnson, Mid-American Garden


Joel Shaber, iris enthusiast, says as a gardener he is "primarily interested in branching which shows the best advantage in a clump. Wide branching, with lots of space between the flower and the stalk" is not something he "looks for, nor particularly likes."  He says he "much prefers a closer-to-the-stalk presentation, where the flower's edge very nearly touches the stalk, but stops just short of doing so." He says that "this style of branching gives a proud, upright look" which he likes, as we can see in these pictures he shares of one of the clumps in his Boise, Idaho garden.
'BELGIAN PRINCESS' clump in the bud stage
Photo courtesy of Joel Shaber
Clump of 'BELGIAN PRINCESS' Johnson '05, showing a closer branching
Photo courtesy Joel Shaber


Joel shares his 'RIO ROJO' Schreiner '09 (below), with show bench wide branching, and compares it with 'BELGIAN PRINCESS' (above), with closer branching, to help us see the difference. Although there are three open, well-positioned blooms on Rio Rojo, he tells us "there is something more to consider." He tells us to "look at the foliage-to-stalk ratio and how gangly and awkward the clump presents itself."  He goes on to say this is his "annoyance with the modern obsession with show branching," and when comparing Rio Rojo to Belgian Princess, it's plain to see "how stately Belgian Princess presents itself in both bud and in bloom, with straighter stalks, and many more blooms," although they are both beautiful.  


Sunday, March 23, 2014

"Talking Irises" PLICATA TALL BEARDED IRISES--an historic past and an exciting future!


Susanne Holland Spicker
Barry Blyth seedling - Yellow plicata
(Photos courtesy of Roland Dejoux)
Hybridizers Barry Blyth and Keith Keppel have very successful plicata programs, with many award-winning cultivars through the years. They continue to explore plicata patterns, coming up with exciting new variations. With their permission, Roland Dejoux, President of the French Iris Society, shares some of the latest cutting-edge Barry Blyth and Keith Keppel seedlings:
Barry Blyth seedling


Keith Keppel seedling


Barry Blyth seedling
Keith Keppel seedling
There are several forms of plicata irises. Walter Moores, hybridizer and iris expert, tells us there are those that are barely a plicata, with narrow margins; some are almost solid; some are banded; there are  amoena plicata irises, others are bi-colored, others look like a seamstress has meticulously applied a hand-sewn edge; and still others look like a pepper shaker has applied the color, like his  all-time favorite plicata, the heavily peppered 'Leanna.'  I can see why it's a favorite!
'LEANNA' (Meininger 1997) 
(Photo AIS wiki)
Plicata irises have been around forever. Shown here, the historic plicata from 1612, 'SWERTI.' It is still grown in the garden of Gordana Stojanovic, and is the oldest documented plicata. 
'SWERTI' 1612   
(Photo courtesy of Gordana Stojanovic)
Considered one of the best bearded irises of all-time, the beautiful white and blue-violet plicata 'MADAME CHEREAU' (Lemon 1844) is grown all over the world, and is still offered by commercial iris gardens, as seen in this photo from Schreiner's Iris Gardens. 
'Madame Chereau' 1844
(Photo courtesy of Schreiner's Iris Gardens)


The first Dykes Medalist was a plicata--'San Francisco' (Mohr 1927), as well as 7 others through the years:
'SAN FRANCISCO' Mohr 1927 DM
(Photo AIS wiki)
'Kilt Lilt' (Gibson) DM 1976
(Photo courtesy of Dawn Mumford)
'JESSE'S SONG' (Williamson) DM 1990
(Photo courtesy of Dawn Mumford)
'SPLASHACATA' (Tasco) DM 2005
(Photo courtesy of Dawn Mumford)
'STAR WOMAN' (M Smith) DM 2008
'DRAMA QUEEN' (Keppel) DM 2011
Jim Hedgecock, of Comanche Acres Iris Gardens, has had a keen interest in the hybridization of plicata tall bearded irises for several years. He says he "knows that many of the future color advancements [in tall bearded irises] will come from the plicata pool of genes." He goes on to say that he sees "multiple bands in different colors on both the standards and falls."  To a certain extent these already exist, but he says "they just need more refining." One of the most exciting advancements, he predicts, is the background colors. "We will see orange, pink, and no telling what other colors as background colors in the near future of plicata blooms" he says. Hybridizers have "pulled out the luminata and glaciata patterns from the plicata" and he says "we can only guess what is next!"  Pictured here is his 2012 introduction and a few of his innovative seedlings in his emerging line of plicata irises:
'ORDINATION' Hedgecock 2012
This iris is destined to be the front-runner of what Jim hopes will be a line of plicata irises with multi-colored standards.

Hedgecock seedling X-5-1
Hedgecock seedling R-102-X
Hedgecock seedling Z-34
Hedgecock seedling X-32
Iris-lover Gayla Schmidt shares two of her all-time favorite plicata irises from her garden with us:
'WONDERS NEVER CEASE' (P Black 2007) HM 2009  AM 2011
This is one of Paul's favorites in his hardy plicata program--WOW!


Gayla says she loves the bold colors--that they just grab your eye when in bloom! She loves the great balance of color in 'Showcase.'
'SHOWCASE' Schreiner 1975
Dawn Mumford has about 35 plicata tall bearded irises in her garden. She says "she doesn't know how you can narrow it down to just 2-3 favorites," and shares some of her all-time favorites with us from her garden:
'QUEEN IN CALICO' (Gibson 1980)
'RANCHO ROSE' (Gibson 1975)
'CREATIVE STITCHERY' (R Schreiner 1984) HM 1988
'ROSE TATTOO' (Nearpass 1976)


As dramatic new plicata patterns are introduced in the coming years, one can only dream of the stunning creations yet to be introduced. I am anxiously waiting for  many new beauties in the iris world.  

Watch for lots more Keith Keppel and Barry Blyth seedlings, shared by Roland Dejoux, in my next post!


Do you grow plicata irises? What is your favorite plicata?  I would love to hear from you!


NOTE: To read more on plicata tall bearded irises, or "The Plicata Men," Jim Gibson and Keith Keppel, and their amazing cultivars, click on the following links:


Monday, September 16, 2013

Are Your Irises Going to Pot?!


As boxes of rhizomes arrive at homes around the country, and gardeners talk about their new treasures, the discussion sometimes turns to the practice of potting. Some gardeners view potting rhizomes as an unnecessary extra step. Other gardeners view it as an integral part of their iris gardening. Though the practice was once considered unusual, it appears that many gardeners have added potting to their gardening routine as they learn more about the potential benefits offered. But, just how many? A recent survey of iris enthusiasts showed that 12% of respondents potted all of their newly dug rhizomes each year. Another 10% responded that they potted any rhizomes that required special care. The remaining 78% indicated that they planted all of their rhizomes directly in the garden. With 22% of respondents potting to some extent each year, let’s take a closer look at the “why” and “how” of this practice. 

Of that 22%, the majority indicated that they employed potting to help protect newly dug rhizomes from extreme environmental conditions while establishing new roots. In the South and Southwest, gardeners wanted to minimize exposure to excess heat and humidity. In many cases, these gardeners also wanted to delay the chores of reworking the soil and planting until the cooler weather of fall. In the North, gardeners potted rhizomes that arrived late in the season, when planting directly in the garden increased the risk of freeze damage. Gardeners who indicated they employed potting with rhizomes that were small, with rhizomes that appeared to be struggling in some way, and with rhizomes that warranted special care came from all geographic regions.  


Perhaps the most widely read information about potting rhizomes was written almost twenty years ago by Walter Moores, who grows and hybridizes irises in Yalobusha County, Mississippi. Mr. Moores has introduced almost 90 cultivars since 1977, and 18 of those have received AIS awards. His earlier work focused on reblooming irises, some of which can still be found in commercial catalogs today -- almost 40 years later! His recent work focuses more on tall bearded irises and species crosses. Having written about the subject of potting in an issue of the AIS Bulletin, Mr. Moores followed up with an article in the Tall Bearded Iris Society's Tall Talk (September 1998). Demonstrating that this information can prove useful in diverse climates, the article has been reprinted by many local clubs throughout the United States and now also appears on the current webpage of the Canadian Iris Society. Rather than trying to rewrite a classic, Mr. Moores’ original article is presented here, with just a few additional notes at the end


Starting Bearded Iris In Pots
By Walter Moores

Over the years the reasons for potting irises to give them a head start in growth have remained constant, but the techniques have changed somewhat. What follows is my experience with potting irises for over twenty years.


Why Do I Pot?

I agree with Bob Strohman [of Louisville, KY] that when the new irises arrive, "It´s over 90 degrees, the ground is too dry and hard to dig, and we´re leaving for a vacation trip tomorrow anyway." So, if you live in the hot, humid South or Southwest and you bought a $45 introduction, you need to think seriously about setting that plant or any other for that matter out in the broiling heat. The alternative is to pot incoming rhizomes and to place the pots in a shady location.


Potting irises has unexpected rewards. While it is so hot at planting time, winter weather and rhizome heaving seem remote. But that extra step of potting back in July and August to protect rhizomes from heat will eliminate rhizome heaving when the ground goes through the freeze/thaw cycles of winter. The root systems developed while the irises were potted will enable the plants to remain where they were planted. Potting does reduce losses during these two susceptible seasons. If bloom is expected on first year plants, potting them and getting them established early makes bloom a sure thing. There are more reasons for potting irises than not, and growth and bloom seem to be the priorities for doing so.

The most desirable month for planting or transplanting irises in hot climates is September, when cooler temperatures make it more bearable to be outside, but it is often difficult to find a commercial source that still has blooming-size rhizomes for sale. Also, it has been my experience that when I have ordered early and requested late delivery, I have received inferior rhizomes. I have also had cancellations or gotten substitutes when I ordered in early spring and requested late August or September delivery. Typically, September is the driest month in the South, and the thirst of newly planted rhizomes can cause an added expense by inflating the water bill. So, to ensure you get quality plants of desired varieties, order early and pot the rhizomes. The boost the rhizomes get while in pots will almost guarantee first year bloom in your garden.

How I Pot
When a box of iris rhizomes arrives, open it immediately and check the rhizomes for mold or rot. If you find any, trim it off. Also, cut or shave off all roots. Then prepare a mixture of one part liquid bleach to nine or ten parts water. Soak the rhizomes for at least thirty minutes. Allow the plants to air dry before planting. The clorox bath is necessary to kill any rot potential that might have developed in transit and to prevent it from forming while the irises are potted. Plants may stay out of the ground indefinitely, but if a good head start is desired, the rhizomes should be planted within a day or two of receiving them.

For years at iris sales or auctions I had always seen a few irises potted in black plastic pots. I used gallon pots when I first started potting irises, for I thought I needed at least a gallon of soil for the plant to survive. I did not trim the roots, nor did I provide a bleach bath. Most of the time I just used garden soil that became as hard as a brick when the pots dried out. At planting time it became a chore to move the heavy pots to their blooming spot and to dig a hole large enough to accommodate the contents of a gallon pot. After experimenting with a few four inch plastic pots, I have decided that they are perfect for the potting procedure. I have not found a rhizome too large to fit in one. If a rhizome has a snout (an extension of growth on the toe), cut it off and consider it to be a second rhizome and plant it in the same pot with the mother rhizome.

The potting mixture should neither be friable or compact. A happy medium consists of one-third Magic Earth (a potting soil with fertilizer), one-third garden soil, and one-third sand mixed well. No other fertilizer is necessary.

Place soil mixture in four inch pots up to the rim and soak with water. The soil may settle and more may be needed. Set the rootless rhizome half exposed in the soil and firm it with your fingers. Make sure the soil level is at the top of the pot so no water can stand in the pot. It would be almost impossible to place a rhizome in such a small pot if it still had the roots intact. New roots will form quickly and wrap around and around the soil in the pot. Tag or label the plant as usual.

Watering the plants may become necessary depending on the weather. It is best to water the pots from the bottom up. Add water to a level of three inches in a galvanized tub, and place the pots in the tub. Allow the water to be absorbed through the drainage holes. Remove the pots when the soil is damp.

It is important to move the pots occasionally so roots don´t find anchor through the drainage holes. A few weed seeds may sprout, but these are easily removed.

Plants may be left in the pots until October to be planted where they are to bloom. In the meantime, preparations should be made for the iris beds or rows that will accommodate the new plants when it is time to unpot, one tap with a trowel will loosen the soil and root ball. That same trowel should have been used to dig a hole about four inches deep. For an extra boost, a balanced fertilizer might be added to the planting hole. Firm the soil around the plant and water.

In summary, many people would consider potting irises to be double trouble. It really isn´t when one considers the growth and bloom potential of the potted irises over the traditionally planted irises. Losses are almost nonexistent.

The author has given his permission for this article
to be reprinted for educational purposes.


Mr. Moores recently stated that the one change he would make to the above article is to add this advice: "When potting rhizomes, remove the leaves as they die to prevent moisture accumulation."

Additional Notes: Magic Earth is recommended in the article above, but it is no longer available. Magic Earth had a guaranteed analysis of 9-6-5. As a substitute, look for an organic potting soil with a similar analysis, such as Miracle Gro Organic Potting Soil. Do not use Miracle Gro's standard potting soil, as it typically has too much nitrogen for use with bearded irises. Once you have selected an appropriate potting soil, it can be amended to best suit your climate. Common amendments used when potting bearded irises include Canadian sphagnum moss, coarse sand, horticultural vermiculite, bone meal, dolomitic lime, Super Phosphate, and granular fungicide. If adding fertilizer, choose one that is slow-releasing and low in nitrogen. Select free-draining pots from 4" to 6" in diameter.  


Do you have a technique or cultural practice that has proven beneficial in your iris gardening? Share it here!


Monday, July 8, 2013

Horticultural Vermiculite: For iris gardens from clay to sandy soil


It's almost time to dig and divide your irises... so now is the perfect time to take a look at soil amendments for better plant health. One of my favorite amendments is horticultural vermiculite. My southern bearded iris garden would not be possible without it, but even my moisture-loving Louisiana irises are happiest when this beneficial amendment is included in the soil blend. No matter what your climate or soil type, the addition of horticultural vermiculite can have a positive effect in your garden. 


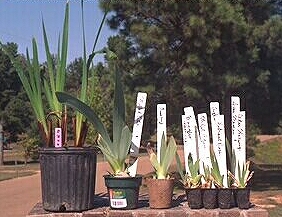
'Flying Down to Rio' (Moores 2005) planted in vermiculite-amended soil

Vermiculite is a naturally-occurring geological material, more specifically a group of aluminum-iron magnesium silicates that closely resemble mica. When processed for horticultural use, vermiculite is introduced to intense heat, causing it to expand into multiple layers of very thin plates. The end result is accordion-shaped granules of sterile, disease-free planting medium. Vermiculite has been used by nurserymen and gardeners for decades, in potting soils and outdoor mixes, in turfgrass and outdoor plantings, for 100% vermiculite growing applications, and for hydroponic growing. Horticultural vermiculite improves soil aeration, assists in temperature regulation, and retains moisture and nutrients necessary to feed rhizome roots for superior growth.


Close view of coarse-grade horticultural vermiculite

Consider the following reasons for using horticultural vermiculite in your iris garden:
  • Soils amended with horticultural vermiculite are better able to retain air, nutrients, and moisture, and release them to the plant as needed. Therefore, a planting medium mixed with vermiculite promotes faster root growth for quick anchorage of newly planted rhizomes.
  • Because vermiculite has cation exchange properties, it holds ammonium, potassium, calcium and magnesium and makes these trace minerals available to the roots as needed.
  • Horticultural vermiculite is a perfect growing culture for irises. The pH of vermiculite is neutral to slightly alkaline (7.0-8.0). It will not deteriorate quickly like most planting materials, and it will not turn moldy or promote rot.

SOIL AMENDING OR CONDITIONING
Coarse grade vermiculite is preferred for outdoor horticultural uses, though medium grade may also be used. With heavy soil, the addition of vermiculite creates much-needed air channels to greatly improve soil aeration. When soil is sandy, the addition of vermiculite helps the soil retain much-needed moisture. Soils may be amended up to a rate of two parts soil to one part vermiculite.

With a large garden area, you may choose to condition only the planting rows. If this procedure is continued for three to four digging cycles, the entire garden area will eventually be conditioned. Because horticultural vermiculite is inorganic, it will continue to function for many years.

Medium grade vermiculite is preferred for potting applications. When used in potting new rhizomes, vermiculite improves soil aeration and diminishes the risk of tender roots breaking as the irises are transferred to the garden. If starting with commercial potting soil, check the label before adding vermiculite, as it may already be present. If making your own potting mix, vermiculite may be added up to a ratio of one part compost material or soil to one part vermiculite.


Planting mix of two parts soil and one part horticultural vermiculite

SUMMER MULCH
If you live in an area that has little to no summer wind, you can use vermiculite to mulch around the rhizomes in the hottest summer months. Vermiculite acts as a constant reservoir of moisture without promoting rhizome rot, protecting your irises from dehydration and scorching during dry spells. This can be especially helpful immediately after digging time, when replanted rhizomes are settling in. After the intense heat passes and winds return, you can remove the vermiculite mulch and save it for use in potting or amending the following year. Or, you can mix it into the soil in other areas of your garden. Used as a mulch, vermiculite may be applied up to 3 inches thick.

FLORAL ARRANGEMENTS
After your irises begin blooming, you will want to bring some of those lovely blooms inside to enjoy. Fill a vase with vermiculite, saturate with tap water, and allow the vase to sit for a few minutes. Repeat this process until the vermiculite is no longer absorbing and water is visible on top. Then, pour off the excess water. Arrange your flowers as you would normally. Your flowers will remain fresh for many days without refilling, and the stems won't develop that unattractive slime that normally occurs when a stem sits in water. When placing flowers in vermiculite, be sure to cut the stems at a slight angle to facilitate wicking.


Flowers being arranged in a vase filled with water-saturated horticultural vermiculite

HOLDING OR SHIPPING RHIZOMES
Vermiculite can also be used at digging time. After you have provided a bleach bath for your newly dug rhizomes, allow them to air dry in the sun. Be careful not to let them bake; the idea is to let the exterior dry without dehydrating the interior. After the rhizomes are fully dry, place them in a storage container and pour vermiculite around them. The vermiculite will prevent moisture fluctuation during the storage period and will provide protection against temperature changes. Though iris rhizomes should never be stored long-term like a bulb, use of vermiculite allows your rhizomes to stay fresh many days longer before replanting. An exact length of time cannot be predicted here, as the timing is dependent on the hydration level of the rhizome (internally) prior to placement in the vermiculite. Vermiculite can also be used when shipping rhizomes to friends.


Rhizomes being placed into a shipping box filled with horticultural vermiculite

A FEW WORDS ABOUT SAFETY
In the past, you may have heard about a link between vermiculite and trace amounts of asbestos. For almost seventy years, vermiculite was used safely and effectively for many purposes, including construction and industrial applications. Then, in 1990, asbestos particles were discovered in vermiculite originating from a mine in Libby, Montana. This mine was primarily used to produce vermiculite for industrial, not horticultural, applications, under the tradename Zonolite. The discovery brought worldwide production of vermiculite to a screeching halt as scientists and regulators worked to determine if any other mines were contaminated. Since that time, strict inspection and safety procedures have been put in place. Though a warning label may still appear on the bag due to past Libby-related incidents, vermiculite is not listed on the OSHA List of Hazardous and Toxic Substances. Gardeners can feel confident that the horticultural vermiculite found in stores today is non-toxic and safe for use in their garden. Just remember, it is wise to use caution when working with dusty garden amendments of any type, including use of a dust mask and watering the garden area prior to application. 

What amendments have been useful in your garden? Post your comments below!

Learn more about horticultural vermiculite with these resources:
Material Safety Data Sheet for Vermiculite, SunGro Horticulture, issued March 1, 2008. This publication details the chemical and physical properties of vermiculite, verifies that vermiculite is not considered a hazardous or  toxic substance by OSHA, and provides useful supplemental information.
EPA Sampling and Analysis of Consumer Garden Products That Contain Vermiculite, August 2000. This report details the results of the first large-scale study of consumer garden products that contained vermiculite. Since the publication of this report, significant advances have been made in the processing and inspection of horticultural vermiculite sold to consumers.