Showing posts with label Kathleen Sayce. Show all posts

Monday, December 29, 2014

PCI Seed Germination Tricks

Kathleen Sayce

It's the wintery time of year in the northern hemisphere, when gardeners think about the coming growing season, and when iris seeds are distributed from seed exchanges. When PCI seeds are fresh, plant them immediately, and within weeks seedlings will appear. But who has 
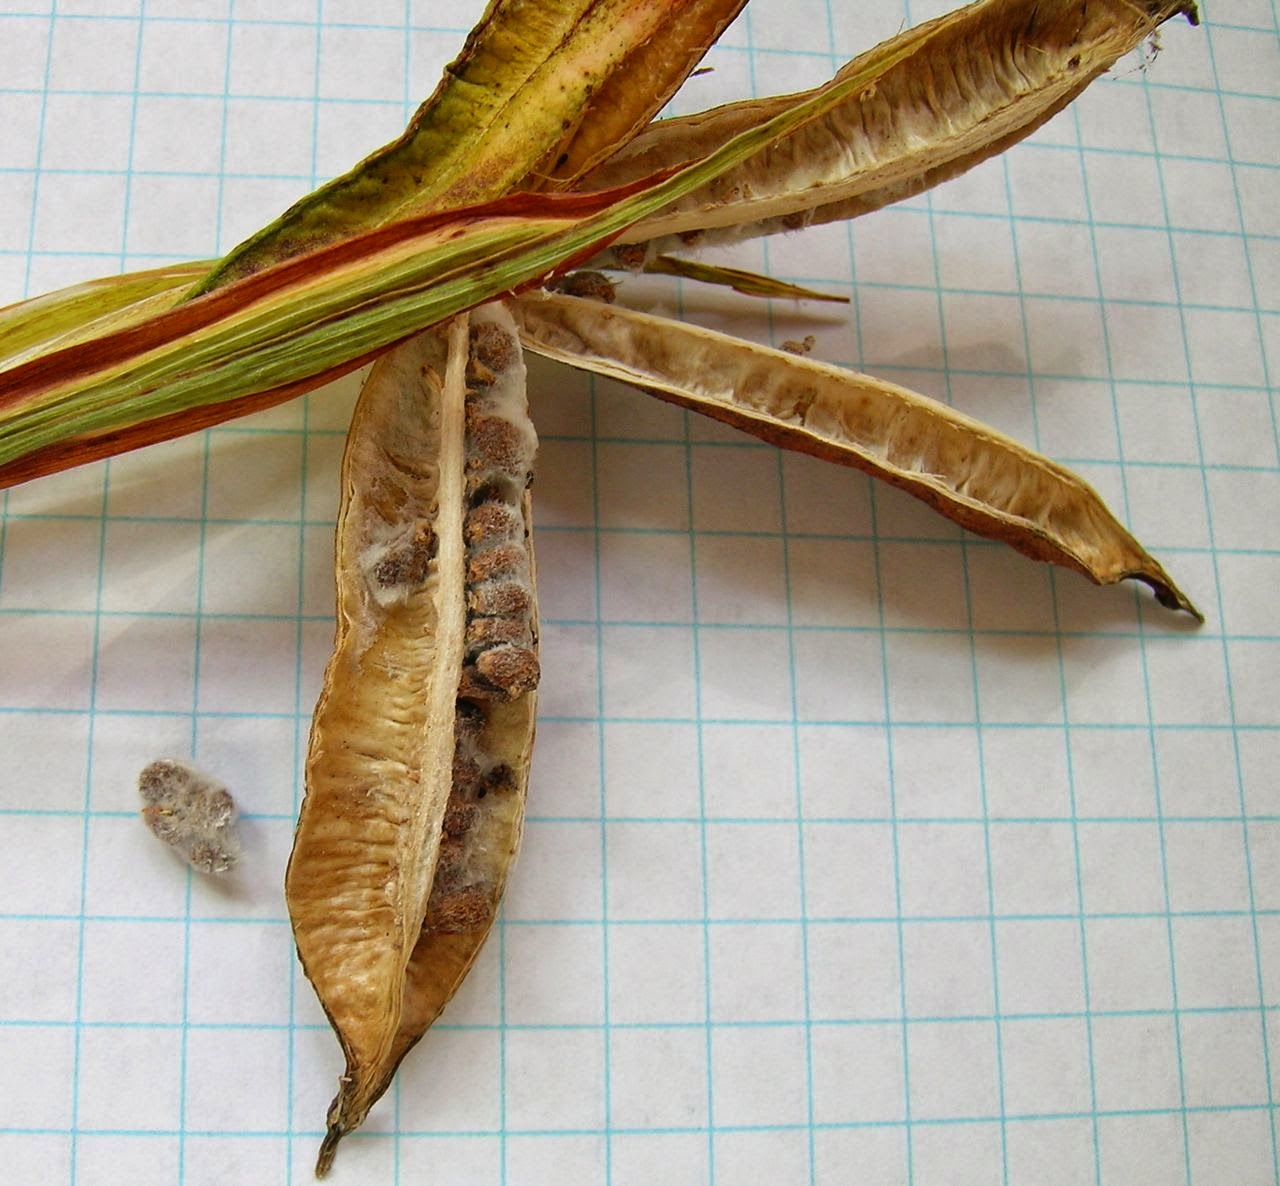
fresh seeds? To send seeds to a seed exchange, they must be thoroughly dry, or they will mold in the seed packets. Alert readers will recall that I wrote about this last fall. Once PCI seeds are dry, they may have to be coaxed into germination. If those seeds are more than three years old, the coaxing might have to be pretty thorough.

PCI 'Mission Santa Cruz' is an older variety, and one I return to again and again for new seedlings.  The plants are sturdy in the coastal Pacific Northwest climate, and flower color is dark and near-red. Unfortunately, in 2014 I did not get any seed from this plant. 

Some general seed starting tips:

First, PCI seeds don't like 'warm' conditions for germination. 'Warm' when compared to many cultivated perennials is 60 F and above––in a cool to warm greenhouse, for example. PCI seeds germinate best between 40-55 F; the actual temperature varies with the species. Tenax and innominata like cooler temperatures, munzii definitely prefers the warmer end. Most hybrids germinate towards the warmer end of the range, around 50 F, though it's always better to stay on the cool side with any PCI seed lot for which the genetic source is unknown.

Second, if the seeds are truly fresh, and were not completely dried, then plant them immediately in well drained potting soil. Soak the pot with several waterings, put them somewhere bright and cool, and stand back. They will be up within weeks.

Third, if the seeds are old, particularly more than three years old, it may help to presoak them in fresh water. Presoaking can be in a dish of water, a small plastic bag, or in a mesh bag hung in the water tank of your toilet. Keeping the seeds at 40-50 F while presoaking may also help; my soaking seeds are kept in an unheated shop that stays between 40-55 degrees all winter.


Fourth, scarify them, removing some of the seed coat by gently rubbing the seeds between two sheets of fine sandpaper or scrubbing them gently in a food mill. 

A food mill is a great tool to rough up seed coats. Put the seeds in, rotate the handle 10-20 times, and shake out the bits of seed coat that were scraped off. 

I've tried one, two, three, up to thirty days of soaking, and also hung mesh bags of seeds in the water tank of the toilet. By weighing the seeds day by day as they soaked, I tracked the uptake of water, watched the seed coat loosen, and in some cases, saw the radicle (the proto-root) emerge.

Yes, those are emerging proto-roots and shoots on PC Iris seeds. They were scarified and soaked in water, and burst out of their seed coats, ready to grow. 

I wrote about these methods for the SPCNI Almanac in Spring 2012, if you would like to read about the details of my tests. [This winter the SPCNI web manager will post back issues of the Almanac and Pacific Iris on the SPCNI website (www.pacificcoastiris.org ); past years' issues will be available to the public, including the first 40 years of the Almanac.]


Here's a new method to try––one I plan to test next year: Soak seeds in cold tea. [I decaffeinate tea at home by steeping loose tea leaves in boiling water, use a French coffee press (or a sieve), time the steep for 45 seconds, pour off the water (save it for seed soaking), add fresh hot water to steep for the cup of tea to drink.] When soaking Iris seeds, change the cold (not hot!) tea every day. For some kinds of irises, this acidic, tannin-rich water seems to help remove germination inhibitors. And it allows you to enjoy teas even when you can not tolerate caffeine––which happened to me last year very abruptly after a lifetime of drinking fully-loaded black teas.


Choices for potting PCI seeds are wide. Any container that can hold potting soil and drain off water will work. I've migrated to large rectangular styrofoam boxes (AKA fish boxes) over the past few years. I punch holes in the bottom, fill with a 1:1 mix of coarse pumice and potting soil, put the seeds on the top in rows, add labels, and a covering of chicken grit (usually granite). Then the planters go outside for the year––and no matter what the weather, they stay outside. I put them on the east side of my house where they get rain, wind, snow, a half day of sun, a rain of conifer needles, the occasional tree branch, and are close to a hose bib for summer watering. The seeds and subsequent seedlings spend a year in this container. This way, they have cool deep root runs, and are fine for their second winter. They are planted out the second spring, about 15 months after planting.


Styrofoam boxes have drain holes; there's a layer of chicken grit (in this case a reddish granite) over the top, and then wire mesh to keep the squirrels and jays from the seedlings––both of these 'varmints' like to eat sprouting Iris seeds. 

I practiced fall planting of seedlings for years, until I lost ninety percent of them a couple of years running to mid fall snow and freezing weather. Now I wait for early spring, and plant out sturdy year old plants instead.


Waiting for spring:  the next crop of PC Iris seedlings are ready to plant. Sturdy, healthy, they will be fine for the rest of winter in these styrofoam boxes, with 9-inch deep root runs and good drainage. 

My methods for seed germination are in place for the new year, including a test of a new method. What are you planning to do?  

Monday, November 10, 2014

Lifting, Dividing, and Transplanting Pacifica Iris

Kathleen Sayce

The seasonal forecast for the Pacific Northwest was for a mild, warm, drier-than-normal fall. Hmm. Warm, yes; dry, no. So far we've had a series of storms blow through, each one dropping around two inches of rain. For dry gardens (those that do not get additional irrigation water), this means that Pacifica Iris began putting out new roots a few weeks ago. New white roots means that these plants can be dug up and transplanted. 

'Premonition of Spring' in flower between storms; the flowers aren't perfect due to the weather and slugs, but provide a cheerful corner in the garden during winter. 


Pacifica Iris are notoriously fussy about being moved, particularly in climates with prolonged dry summers. I've mentioned before that checking the roots to make sure that there are 1-4 inch long white (live) roots is important for success. 

New roots on Pacifica Iris fans show that this plant is in active growth and can be moved. 


Today I went out between showers (the thunder, lightning and hail type of showers) to redo a densely overgrown patch of PCI seedlings. Let's not go into why I did not do this two or three years ago. As gardeners know, life often gets in the way of garden plans and ideal timing for gardening activities. 

There are five different irises in this patch:  four seedlings, one of which has not yet flowered, and one named variety. 

What a little procrastination can give you:  a near-solid mass of irises to separate and divide. If I'd waited another year, it might have been near-impossible to divide out the different seedlings. Spuria iris on the lower right (its long leaves were broken down in the last storm), 'Premonition of Spring' on the left, next to the cyclamen, and in the middle, three massively overgrown PCI seedlings. 

One of the seedlings is not going back into the garden. It came to me as orange-flowered I. innominata seed; by the second year it was clear that this seedling is really a Spuria Iris. So it's going south to Los Angeles, to a much warmer climate where it might actually flower.

The clue that this clump is not a Pacifica Iris:  the leaves were three to four times as tall as the other irises around it!


Pacifica Iris clump in the middle, Spuria clumps on the right with their leaves already partially cut back. 

Three of the seedlings are from open pollinated seeds from Debby Cole's garden on Mercer Island, Washington; the pod parent is her vivid PCI hybrid 'Egocentric'. I'm still evaluating the lavender flowered seedlings; the yellow seedling is a nice sturdy plant, and I'm sending starts to other gardens.

One of the lavender-flowered PCIs from an 'Ecocentric' pod parent seed lot. 

Another seedling from the same seed lot; sturdy short plant, waiting to see the flowers for one more season before I decide to keep or toss. 


A yellow flowered Pacifica seedling, pod parent, I. 'Egocentric', from Debby Cole.  This one I will keep. The plant is sturdy, the flowers are held well above the foliage, and are well shaped. 

The fifth iris clump in this patch is 'Premonition of Spring', Garry Knipe's winter flowering selection.  I divided this one into two smaller masses and replanted one near the other. Like Iris unguicularis, it flowers sporadically from fall through early spring. In fact, both clumps (POS and I. unguicularis) have buds or flowers right now, and will flower occasionally during fall-winter-spring months. I plan to move an I. unguicularis clump nearby. 

Once each clump is out of the ground, I use clippers to cut apart the fans. Sturdy rhizomes grow between groups of fans, and my hand clippers easily cut through them. 

A nice pile of more than one dozen fans are going to other gardens. 

After replanting, the plants have room. Next spring I'll be able to see the flowers on each plant more easily, evaluate them, and decide which seedlings to keep. I also found two mesh bags with seeds inside––these are going to be scattered in a patch of native grasses to naturalize.

Lifted, divided, and replanted, and ready to grow on this fall and into next spring.

I was done just in time to avoid the next shower!  


Monday, September 15, 2014

Drying Pacifica Iris Seeds

Kathleen Sayce

When I first collected Pacifica iris seeds, I learned the hard way to let them dry thoroughly before packing seeds into envelopes.  Several packages of fresh seeds developed mold! 

Seeds need ten days to two weeks of patient drying time from pod to package. Gardening is not only a creative physical and visual practice, it's a constant practice of patience––and a lesson I keep returning to again and again, apparently I'm a slow learner when it comes to patience. 


Ripe Pacifica Iris pod with moldy seeds, right from the garden. This whitish mold is in the seed coat, not the seed. The seeds will germinate despite the mold. 


I quickly learned that no matter how dry the pod, the seeds needed their own drying time once they were decanted. The following images show the transition from fresh, damp seeds to dry seeds that can be packaged safely. 


Fresh seeds, right out of the pod:  Smooth and light colored, these seeds need to dry for a couple of weeks. 
Seeds are usually light brown as they come from the pod; they can be greenish, yellow, gold, or even pink.  These seeds will feel damp in your hand. If you are planting Pacifica Iris seeds right away, skip drying and plant them out. Pacifica Iris seeds can live when stored cool for several years, so if you plan to store them, then take the time to dry them first. Seeds ripen as they dry down, are more resistant to cold, and last longer in storage. 


Partially dry, these seeds are starting to darken. 
As the seeds dry, they darken and develop patterned seed coats. The partially dry seeds, shown above, will still feel slightly damp in your hand. They are still too damp to store. Be patient. Let them dry a few more days to a week. 

Finally dry enough to package and send off in the mail to a seed exchange.

Thoroughly dry seeds are light, feel dry to the touch, and are medium brown to dark brown to black in color. The seeds in the photo above are dry enough to put in envelopes and store, or mail to a seed exchange. 


These are extra pods. Note the brown pod at top with loose ripe seeds above it. 
Another hard lesson was that not all seeds are needed by seed exchanges.  One year, I hand cleaned a leaf bag (one of those large black yard trash bags) full of pods of Iris douglasiana seeds––there must have been eight to ten ounces of seed by the time I was done. The seed chairman that year cheerfully used the seeds as extras where those ordering wanted vigorous species-type seeds. 

Nowadays I count pods and rarely collect more than 10 pods of any one variety, which will give more than 120 seeds. On the low end, I aim for at least 2 pods, or 20-30 seeds, as a minimum donation of one variety, unless it's something I know only a few people will want. I have one pod coming on a rare iris and will share seeds directly with those who want it, if I get more than 10 seeds from that single pod. 

If you save seeds for seed exchanges, think about how many seeds to send in. Seed chairs typically want to send out at least 5 seeds of each variety, and if they get only 10 seeds of anything, then only two orders can be filled. 

These days, I clip off extra seed pods and compost them, or toss the seeds out in a rough meadow. Someday I may have a mixed meadow of grasses and irises in that part of my garden. I also toss them on the lawn by the iris beds, the seeds in the photo above may germinate where they fell. 

Seeds are a promise of plants to come. Every time I collect seeds, plant them, and grow new plants, it feels like a blessing from nature. When those new plants bloom and set seed in turn, it's the great wheel of life turning in my own garden, year after year. 

Friday, August 15, 2014

When Pacifica Iris Pods Are Ripe


Kathleen Sayce

Mid to late summer is exciting:  it's harvest time for Pacifica Iris pods. Some species irises shed seed by early July in my garden, including Iris tenax and I. innominata. These species often grow at high elevations in the wild, flower in May or June, and have ripe seed by mid July to early August. They waste no time cranking out the next generation. Other species take more time to ripen seeds, nine weeks instead of five to six weeks, including I. douglasiana. Pods often go through a color change as they ripen, from green to gold or yellow. Even when not opened, a yellow pod has mature seeds inside, ready to collect. 


Just a few weeks ago, seed pods were green. 


Iris pods are opening all over the garden by late July, when the mesh bags come into use. Here, all pods in this cluster have opened, the tips are spread on the upper two, and the bottom one has valves spread to show the seeds inside.

Mesh bags or nylon stockings are good devices to use to contain seeds and ensure that a gardener's work in crossing specific parents isn’t lost at the seed collection step. Saving even a few seeds from a choice cross can be important in a hybridizing program. 

I cut the stems and collect the pods, still in their mesh bags, to dry before taking out the seeds. The stems can be tied together with a wire tie or string, hung in a dry shady place, out of the sun and away from direct heat––just as you would dry herbs or flowers, or put into paper bags in a warm dry spot. After a few days, any pods that can open, have done so, and the seeds are ready to clean and package. 


A basket of treasure:  Ripe pods in paper bags, ready to dry indoors. 

Normally the valves separate from the pods, and the seeds break off and scatter. Occasionally pods stay closed or only partially open. Either the tip will not separate, or the sutures along the edges do not open.  When this happens, I use a knife or razor blade in a holder to cut the tip off, or cut along a suture line, being very careful to keep my fingers intact, and to not cut into seeds. Then I gently peel out the seeds.

Seeds go into a bowl. Use a large bowl that you can swirl seeds around in. This lets you blow or toss seeds outside to separate seeds from chaff and pod fragments. I also use a sieve to shake out fine bits if the pods are dirty. I clean the seeds and remove all non-seed bits and pieces, insects, et cetera. Separating seeds from chaff is a very old process. Humans have been doing this for thousands of years. And it’s fun! 

After the seeds are clean, I put them in a clean bag (mesh or paper), to continue air drying. The label moves with them. I save seeds for seed exchanges, such as Society for Pacific Coast Native Iris, and Species Iris Group of North America.  

I learned the hard way to not put fresh seeds into glassine or plastic bags––they mold. The mold doesn’t kill the seeds, it’s just in the seed coats, but it looks terrible, and when it’s really bad, all the seeds are encased in a dense whitish mold into one solid lump. Ugh!  If there's too much mold I scrub the seeds with a plastic scrubby to clean them, then rinse and re-dry the seeds. 

Drying seeds, in a row of paper bags. This takes patience, and at least ten days!

Let the seeds dry thoroughly before packaging each seed lot. I’m not naturally a patient person, so this is hard. Wait ten days, at a minimum. More is better. Only when the seeds have dried indoors, in a clean mesh bag, and I have let the days slip past, do I then put the seeds into an envelope, label it, and set it aside to send to a seed exchange. I also share seeds out to gardening friends, and this is when those seeds are mailed. 

Labels need to include what, when, where, and any details of the plant or flower that are important. List:  Pod parent, pollen parent if known, the flower color on the pod parent if it’s a species or unregistered new flower, likewise any characteristics of the pollen parent that were important to note, or bee-pollinated, if open pollination was used. If you use crossing codes to track garden crosses, write down those codes too. This helps you and others track the parentage of your seeds. 

Another task is to take all the used mesh bags, wash them in warm soapy water, rinse, dry, and then freeze them for at least two weeks. Why freeze the bags? If any invertebrate eggs are in the bags, this will kill them. Washing, drying and freezing helps ensure that the bags are clean, and ready to use again next year.  

Do you grow PCIs, and do you save seeds to give to other gardeners?


Monday, July 21, 2014

Bagging Pods to Save Pacifica Iris Seeds


Kathleen Sayce

All irises have pods with three valves that open and spread when seeds are mature and pods are dry. Open pods toss seeds a few feet, shaking seeds out in the wind and opening a bit more from day to day. Iris pods often open at inconvenient times, usually on hot sunny days when I'm away from home. This was a frustrating reality for me when I started crossing plants and saving seeds, because I'm often hiking in mid summer, away in the hills when those pods pop open. 


I. douglasiana has green pods with three valves. Bag and save upright pods, not the sprawling stems. You will find the mature pods more easily later if they are upright.

I began collecting iris seed by designating small paper bags for each variety, adding pods to the bags day by day and week by week, cutting off the pods when the color started to change from green to brown. But inevitably, some slip past, and open on their own. Tracking seeds of choice hybrids was tough:  several times the pod opened and seeds slipped out, and were scattered in the garden in less than 24 hours. When you’ve hand pollinated the flowers after growing the parent plants, losing the seeds at ripe pod stage is tough. 

Iris douglasiana has the longest ripening period. Pods may take nine weeks to fully mature.

Iris douglasiana is the most widely grown Pacifica Iris, and its pods are ripe about nine weeks after flowering. Some species ripen a bit earlier, like Iris innominata, which has lovely yellow flowers; in five to six weeks the seeds are mature and ready to gather from this species. I learned this the hard way, going out weeks too late to bag what I thought were green pods and finding only the pod sections, brown, dry and open with the seeds long gone. 

Iris innominata can ripen seeds in five to six weeks. I know, because I lost all the seeds the first year this species flowered in my garden. I sauntered out in week six to put pod bags on the three green pods, only to find they were brown, open, and the seeds were scattered. 

There is a solution:  organza party bags, AKA seed pod bags. These days I check plants a few weeks after flowering, cut off flower stems on plants whose seeds I do not plan to save, and put mesh bags over the rest. For my original purchase, I got green bags, thinking green would blend in better over the summer. Not bad, but I now find bags all winter, even in spring, that were overlooked the prior summer! 


Mesh bag on green pod––unobtrusive, discrete, and could be easily overlooked in a few weeks when the seeds are ripe. 

When the pods are ripe, I cut the stems off, tie them together, label the bunch, and dry the pods still in the bags. If they open and shed seed, great, this saves me time prying open each pod. If they don't––and some late flowering I. douglasiana plants often do not open their pods––I slice each pod open along one side and pry out the seeds.  

If the seeds are going to a seed exchange, they go back into a clean mesh bag, labeled, and air dry for a couple of weeks. If I keep seeds to plant, I plant them immediately outside. 


The goal:  New seedlings. Note the styrofoam boxes, top layer of chicken grit, and mesh cover. The grit helps in heavy rain to keep the soil mix in place. The mesh wards off any number of animals and birds that think germinating Pacifica Iris seeds are tasty snacks. These seedlings will go out into the ground in early fall. 

I live in a summer dry, winter wet climate, which Pacifica Iris prefer. Seeds go into styrofoam boxes, in a well drained mix, covered with a thin layer of fine granite gravel (chicken scratch). A fine wire mesh cover goes over the top, to keep voles, chipmunks, jays, crows and other animals from eating germinating seeds. The seed boxes stay outside all winter, no matter the weather, and in the spring the next crop of Pacifica Iris seedlings emerge. 

I'd like to know what other iris growers think of using mesh bags, and what color of bag you recommend. I need to order more. I’m thinking red or orange for the next order. Or should I go wild and order mesh bags to match the pod parent flowers?


Monday, June 2, 2014

What Rains May Come to Pacific Iris Flowers

Kathleen Sayce

Irises are at an inherent disadvantage in a spring-wet climate, because they have upturned flowers like tulips instead of down-turned flowers like many lilies. Hybridizers in dry spring areas have selected for wide, frilly flowers over the past few decades; usually these plants flower in late winter to mid spring. In spring-wet areas, these flowers are hammered by rain, damaged so badly that pollination cannot occur. 


A modern wide-petaled, frilly Pacific Iris flower on a dry day. This is an unnamed seedling, flowering for the first time this year.  
So what's an irisarian to do with wet weather during flowering?  The answer is to evaluate flowers to see which ones do well, or at least better, in intense rain. Most of us can live with moderate damage, and are happier with a colorful spring flower display that doesn't look like soaked tissue paper was tossed around the garden. 

When it rains during flowering, I take a waterproof camera into the garden and record how well each flower and its plant hold up. Flower shape is important. Stem sturdiness is important; lovely flowers that lay flat on the ground (due to weak stems) are not going to make the cut. Very important is how well the flower survives being battered by rain and wind. Enough rain, and any iris flower can be battered into oblivion, so the following is a first attempt at a weather-tolerance scale.

For this year, the following is the result of rain-on-flower observations in my garden:

Wide frilly flowers often fare badly in heavy rain; they can tolerate light rain. The petals are thin, and a few days of intense rain shreds them to fragments. 

The same unnamed Pacifica Iris seedling following an intense rainstorm. Its wide petals tend to melt in heavy rain. The damage to the falls is not a deer or slug, it's rainfall that tore off portions of the petals. 
Yellow flowers typically melt in heavy rain. Open one day, gone the next. It's quite shocking to see how poorly this color fails to hold up to a good storm. Do any yellows hold up well in rain? I grow four or five, and am going to research this in coming years. One of the yellows has weak stems, and these are battered to the ground in storms. It's toast. 

Another unnamed seedling, a lovely yellow, after a rainstorm. Note the damaged style crests and standards, and melted falls. 

White flowers vary in durability. Some do well. Others melt. Doug' flowers (Iris douglasiana selections and crosses) are at the core of many reliably sturdy hybrids. 'Canyon Snow' is very sturdy for a white flowered Pacifica Iris, and is a Doug' selection. 'Cape Sebastian' is an unregistered Doug' selection with a white flower and purple signal, and it also does well. Both have been available for several decades, and are highly recommended. 


'Canyon Snow' when dry, above, and wet, below. This Doug' selection holds up well in rain with sturdy upright stems and durable flowers. 

Older hybrids have narrower petals and less frilling, and often do surprisingly well in heavy rain. Go back about 20 years, to find these sturdy forms. 'Mission Santa Cruz' and 'Cape Ferrelo', to name two, also do well in intense rain. 

'Harry's Rootbeer' holds up in rain. This hybrid is a 'Mission Santa Cruz' progeny, bred for southern California, which also does well in the Pacific Northwest. 

Species and species crosses often also do well. This includes Iris tenax, I. tenax x I. innominata, I. chrysophylla  x I. douglasiana, and others. Flower petals are sturdy and narrow compared to modern hybrids. Flowers are held upright on strong stems, which rarely flop on the ground in heavy rain. Only I. innominata tends to melt and flop. 

Iris tenax from Lewis County, Washington, does well in rain, as do many Pacifica species. 

I. tenax is usually upright and sturdy, with flowers holding well in all but the most intense rains. No surprise, this species is native to the Pacific Northwest, and flowers latest in my garden. 

From observations made this spring, I know that some yellow flowers melt in heavy rain. I plan to look for and breed for sturdier yellows, and use rain screens to protect plants now. 

For those large frilly flowers, use rain screens. If my climate is consistently wet in mid spring when these ruffled beauties flower, then I have to be ready to lose them. They may be toast as well. 

Older hybrids, in a wide range of colors, do well. Rejoice! Use rain screens over the plants I want seeds from, and enjoy the flowers, rain or shine. The ideal form has strong petals and sturdy upright flower stems. 

As for species, they flower very well, so long as I keep away from yellows. Too bad for me that the yellows are my favorite color. I'm just going to have to get over it. I would like to know if readers have similar observations in wet spring areas. Are there particular colors that rain damages more in your garden? Or flower forms that do not hold up well to your weather?


Monday, April 14, 2014

When to Transplant PCIs: Wait for Fall


Kathleen Sayce

Pacific Coast Iris (PCI) can be so touchy to lift and transplant that gardeners may wait years––letting a particularly choice plant increase in size so that half or more of the clump can be left alone, just in case it really doesn't want to be moved. Translate 'doesn't want to be moved' as 'dies' and you have a pretty good idea of the PCI response to conditions or changes in conditions that it doesn't like. PCI aren't easy plants. They are a good challenge to a gardener's skill set, in a rock gardening sort of a way. The payoff is that when they thrive, the flower show is amazing, and unparalleled in the iris world.

Iris tenax x innominata seedlings in their third year. These plants flower weeks later than modern PCI hybrids, extending flowering from early June into early July. Photo by Kathleen Sayce


I have a pale yellow PCI seedling in my garden that I left to grow an additional year, just in case it doesn't take well to being divided and replanted. I'm waiting this spring to see how it responded to being moved last fall. If it survives, no, if it thrives, then I'll be sending plants out to several growers to see how it does in other gardens. It has many marks of a new and desirable hybrid, and the flowers are nicely complex, with a delicate turquoise flush, golden yellow signal and reddish veins, an open and upright flower, a sturdy base of leaves and strong shoots. The current test is to see how it transplants; desirable PCI seedlings often fail at this test.

This seedling PCI last year had lovely flowers with golden signals, reddish veins and a turquoise flush on the falls. This year, I dug it up, divided it, and moved it. Will it thrive? We'll know in a few months. Photo by Kathleen Sayce. 


Choosing when to divide and transplant PCI can be funny to watch from outside the garden. The gardener pulls soil and mulch away from the base of the plant, looks closely, shakes her head, pats the materials back in place, then moves over to check the next plant, then the next... then goes away for a few days or a week. Or two weeks. Or a month. We are looking each time for that clear sign of a growing PCI–-live white roots on the base of the leafy shoots. Live roots grow twice a year, in spring and fall. In cool moist climates, new roots can grow for several months, almost year round, while in climates with prolonged dry summers, they might grow for only a few weeks: 6-8 at most in fall and spring, with cold weather slowing growth midwinter, and dryness slowing growth midsummer.

Fall is a good time to transplant PCI. These plants have sturdy shoots with white roots on the current year's fan. The new fans are visible as tiny sprouts above the roots, on the left side of both transplants. These transplants are from a vigorous yellow-flowered I. douglasiana selection. Photo by Kathleen Sayce

Why this spring and fall root growth pattern? PCI are native to the West Coast of North America, which has a Mediterranean-type climate. This means that there is a brief to very prolonged dry season each summer, depending on latitude, when PCI go summer dormant. When rains return in the fall, they produce tiny new fans of leaves with tiny buds of roots; and older roots just behind them, on the current year's fan, start growing again. The new fans elongate in late winter and spring, and shoots emerge to bloom in early spring to early summer, depending on latitude and climate. In late spring to summer, PCI set seed, and go dormant for the balance of the summer season. They awaken in fall with the onset of cooler temperatures and rain, producing new roots and tiny new fans.

Nurseries know this, and depending on where each is located, aim to ship plants when their roots are growing strongly. This is most often in the fall. For gardeners accustomed to shopping for new flowers by seeing flowering plants at a nursery, and taking them home, this delay can be frustratingly long.

Patience is everything in a garden. Growing PCI is a study in patience. You see the plant. You find a nursery that sells that plant, and place an order. You wait. That fall, or the next, it arrives, and you plant it, and you wait. Perhaps it dies––these are PCI we are discussing, after all. So you try again. When it flowers, you see that it's the plant you sought. Or not. And you try again.  But what a reward with success.


Saturday, March 29, 2014

Pacifica Irises in Snow

By Kathleen Sayce

Written February 17, 2014

I started growing Pacifica Iris more than fifteen years ago, when the West Coast was in a warmer, drier weather cycle, so it took several years for my plants to experience even a little snow. In the past few years, a few snow days each winter have been more common than not, so I can now report knowledgeably on what happens to Pacificas in the snow.

Iris chrysantha under light snowfall

First, some species in my garden, including Iris hartwegii ssp. australis, I thompsonii and I. tenax, normally go completely dormant. In warmer snow-free years, they may or may not brown down until February. It's not uncommon for all of these species to keep green leaves for most of the winter, and then in early March, suddenly the old battered but still greenish leaves vanish, and a few weeks later the small, stubby new leaves appear.

Now add snow to the mix, even just a few days, and wham, the leaves brown off, and the plants vanish from the surface.

The second group, of species, includes Iris innominata, I. chrysophylla and I. douglasiana, and also hybrids, hangs on and keeps some green leaves all winter long, though those leaves can look pretty battered, and many are browning off, by late February. Hybrid Pacificas are a mix of many species, largely from around the Bay Area of the central California coast and nearby mountains. These tend to have more I. douglasiana genes, which is a sturdy evergreen species with large leaves.
Iris 'Cape Ferrelo' under light snowfall.
So the hybrids stay evergreen, come snow, hail, ice storms or torrential rains.


These traits, evergreen leaves or not, and a tendency to go fully dormant in snow or not, have helped me sort out the likely genetics of Pacificas that may come to a gardener without a label, or with an erroneous one. I. douglasiana and I. innomnata have durable evergreen leaves; I. douglasiana leaves tend to be thicker, longer, and wider, while I. innominata leaves tend to be a very dark green, narrower, and shorter.

Seedling Pacifica Iris emerging from snow in the garden.

My I. hartwegii ssp. australis plants were grown from seeds collected by a SPCNI member, Richard Richards, who lives in southern California. The first winter they experienced snow, I sent Richard a photo to show the plants well buried in white stuff. He wrote back that there was a drought that winter in the San Bernardino Mtns, and these plants might be the happiest individuals of that species anywhere on the West Coast that year. This was the first year that I noticed just how differently Pacificas go dormant under snow.

Iris hartwegii ssp. australis emerging from snow cover. 


The last photo in this post is a Pacifica iris that was labeled I. innominata 'Burnt Sugar' when I bought it many years ago. The leaves are too wide and long to be solely I. innominata, which is the mostly likely species based on flower color. There's not a hint of dormancy when ice storms and snow arrive. This one has some I. douglasiana genes too. By the fairly narrow falls and standards, it is not too far from a yellow-flowered species selection, and is not a modern hybrid. ['Burnt Sugar' is not a registered name] Thanks to an industrious Steller Jay, the original tag, including source, is long gone.

Iris 'Burnt Sugar', an unregistered selection, in full flower. 


Knowing now how Pacifica species behave in snow, it's clear that 'Burnt Sugar' has both I. douglasiana and I. innominata genes, hence the lovely yellow color with red veining on a sturdy plant with dark green leaves, and no sign of dying back under snow. 

To learn more about these irises and others, visit SIGNA, the Species Iris Group of North America's website.